Wednesday 31 December 2014

Christmas Update


Just keeping you updated on a small Christmas venture. I wanted to work a little bit on my environmental concepting, however I realized I was having trouble with idea generation, this was probably because I didn't have any specific idea in mind of what I wanted aside from 'fantasy landscape'. Almost miraculously a few days later FZD released the absolute perfect video on idea generation. It basically was using photo bashing as a technique to generate loads of completely different landscapes. I gave it a try and they came out really cool, but I think I may have relied on the photo bashing too much and painting over them not enough, so there's still work to be done here. I still thought it was a really interesting tutorial though, and when we inevitably have to do some sort of landscape design in the future, a technique like this might come in useful. 


https://www.youtube.com/watch?v=P-l9kNXAeGQ

Sunday 21 December 2014

Lessons Learned

“It’s failure that gives you the proper perspective on success.” - Ellen DeGeneres
This last four weeks have not been my best, but there's allot to be learned here as well. This project certainly didn't leave me on the high note that my sentry turret or film room did, but the best thing to do at this point is salvage everything there is to be learned from it and  then try not to dwell. 
So let's see now; my finished model ended up something like this: 

Lesson1: The absolute most important lesson here is the importance of orthographies. I tried to model a stylized character from a real person. I believed that I'd be able to adjust it on the go and I was wildly wrong. If I had more time, maybe I could have pulled it off, but I didn't and I should have known this at the time I started modelling. If I had followed my design more closely, I would have been able to pull of a much more unique and stylized character like the ones from my designs. The hunch for example- I always told myself throughout the process that I would achieve posture through rigging, but being left with no time for such a glamorous stretch goals, my character lost instant personality though not being hunched over, with dangling, ungainly arms. 

Also the shapes! My design hinged fundamentally around being sharp, jagged and harsh. Where as this came out being rounded and friendly- again I put this down to not having proper orphographies that I could model too. The hood in particular stands out as a big thing that should have been very different.
 I mean, look at the difference in silhouette that should have been.

I really find it strange in retro respect some of the decisions I made, there are very simple design mistakes that could have vastly improved my character. I mean- fundamentally, I don't think the model was bad, it just not what I had designed. In fact, technically I feel it was quite adequate.


Lesson 2: 
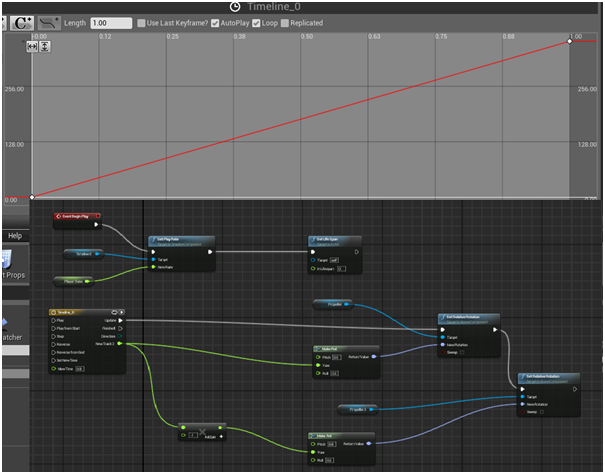
Time management. I don't want to make excuses for myself, but it does have to be mentioned that I lost a huge amount of time designing and re designing in the early stages of the project because of how vast it was, and my own uncertainly on what I wanted or what was expected of me. But despite this, there are some weird things I got caught up doing while modelling. The hands for example, are laughably detailed compared to the rest of the model. Ironically I do really like them, it just wasn't an appropriate use of time. I also was left with tragically little time for texturing- which kind of ties into the next lesson.

Lesson 3: I needed way more texture planning.

After doing some colour studies and colour themes, there was a lot of colour work done premodelling- thing is, I knew I didn't like any of them in advance. I was just hoping as I textured something good would happen. But while the colour scheme was far from ideal, the bigger problem came with texture style. My original style plan left colours in a painterly, simplistic fashion.. The problem with that was, that wasn't my model anymore. Instead of the model I was supposed to have- I had a semi realistic that looked outright unfinished with the simple textures I had planned. So I kind of made it 'half realistic' texturing in an attempt to adapt to my new model but also stay loyal to my original plans. I didn't get the best of both, not my a long shot, I think I got the benefits of neither and it ended up looking like it really didn't know what it wanted to be. Which it didn't.

Lesson 4: Making sure you understand the brief. I can't stress enough how much simpler things would have been this project if I'd have just got the project more. Especially the dichotomy parts of it. I'm not happy with the design I went with and now that it's too late I can think of a million other awesome ideas for dichotomous characters, I have one particularly specific one about a sports bike rider- tall, edgy and fast in a full leather race suit, compared to short, round, half helmet cruiser or Harley rider- two stereotypical enemies in the motorbiking world. It would have been fun to play on those sterotypes.
In a strange way, now that I've written this post, it's like I've made peace this project and can just embrace the lessons learned and move on. It's almost pleasant.


Sunday 14 December 2014

Queue Panic


My characters aren't dichotomous. It took me drawing out my 'final' designs to realize it, but I have. 

Queue panic.
I immediately tried to adapt my designs to be more contrasting, I experimented with cute/creepy, smart/dumb, and other opposites that could be applied to by already existing designs. I tried rolling with cute/creepy but by the time I was finished I was sick with dread on even justifying it as a design. It felt like it lost all it's character and charm. I didn't like the robot as a scary character and likewise the girl who was representative of darker and more unsettling characteristics herself. 


I backtracked and tried to just work with what characteristics they already had and just reemphasize them more. I think I settled on a sweet spot- cynical and tired verses young and wide eyed. I think this comes across despite one being a robot... I also tried to make better use of shapes; sharp and hard edges and smooth round curves to create more dichotomy. For a quick fix I think there is some significant dichotomy, I only wish there was more time for me to draw the pair out nicely, but even without our (very much appreciated) weeks extension- there's still no time. I'm already way to far into the project to still be concepting but the redesigns took out a huge chunk of this week that should have bee spent modelling.  I'm still trying to claw out of this deep self loathing 'I missed the point of the project' pit... again! This is clearly not my project. 
-

In between choosing which ideas I hate the least, I also managed to put together some colour themes. I thought it would be a nice step to have before colour schemes, basically just gathering a load of images that had a nice palette, so I can get an idea of what colour scheme I want to use. I asked people around which ones they like so I could work in on a few of the popular ones.
A particular design choice I made to help enhance the dichotomy was to have the two at contrasting ends of the colour wheel, only to be connected by the girls arm which would be made of the same material and colour as the robot- to bring the design together as one unit. I like to think that they do look like they belong together in the same universe because of some shared features like the eyes and strong use of triangles.

In the meantime I finally started modelling, and with no proper orthographies to speak of, I'm using an actual person for proportional values so I can get them correct and then edit them to match my designs. I'm finding modelling clothes particularly difficult and am having some troubles keeping it low poly, I'm also at a stage where I have no idea how I'm going to do the fur or hair. On one hand I think using alphas wouldn't look as effective or adhere to the design as much, however it is a more standard and budget conscious method I think I need to be wary of this as the tri count is looking quite high already.
It was also incredibly irritating to do the trousers which are supposed to be incredibly baggy and add allot to  the shape, but I ended up having to neuter them down significantly because it kept clipping between the legs, ruining any future rigging potential. Also when I tried to make them larger on the outside, it looked ridiculous.


I had more luck with the head, which I am cautious to say I'm quite pleased with, but I'm apprehensive because maybe my standards have been lowered so viciously that any small victory seems like an enormous relief. I liked that I managed to get the stylistic nose tilt that makes the character look younger, it also makes the big round eye sockets even larger by comparison, which is good since the eyes are meant to unsettle you, in contrast to the almost 'cute' face.

Next week will be a huge push to finish the whole thing, it's disastrous that I'm even this far behind in the first place, but |I don't feel it's impossible just yet, as long as I keep up the pace and finish modelling within the next day or so. There'll be some late nights, I can tell.

See you next week!


Sunday 7 December 2014

Stay away from da Voodoo


Ok, feeling the pressure now, got to get some usable designs now. I went and completely revisited my style, but perhaps mistakenly (in the sole interest of time) kept to the same themes. Thanks to a really interesting lesson from Mike Kelly, I was much ore away of shape this time around. I decided I wanted a contrast in shape between the two characters- which I decided would be a robot for the engineer character, or a elemental or totem summon for the Shaman. I tried to bare in mind what Emma warned against with Shamans in the initial feedback session- beware of shamans because they are generally adorned with garments far too detailed and eloquent to design and model in the remaining time. Bearing this in mind, any designs of the shamanistic nature I designed from then on were heavily stylized to the extent where detail was inconsequential to the silhouette and characterization of the design. I felt I was in a good place with the shamans, but in the end, decided they were too simple. 


So I went with the robot and engineer. I settled on a design style I wanted for this quite early, and even decided to keep the cartoon 'white eyes' that were initially just for the purpose of silhouetting, I thought they added allot of character and also gave a direct link back to the robot, who shared the same blank white eye design. It just gave them the same 'in-universe' feel and I liked it. I tried to avoid assigning her characteristics during this stage of the game, but she grew on me, and the more she grew on me the more I found myself leaning and creating more creepy and unsettling types of designs for her. The reason I was so locked in on having a robotic arm was because I wanted it to be very clear she was an engineer, so I used the silhouette to try and communicate that, she isn't a soldier or a medic- no, her purpose is directly linked with her companion and is relevant to him. To get that feel, I used actual machine parts to reference that, while making sure that whatever her arm was, I'd know how to rig it and have it function as a regular arm if it came to that. 


The problem I was finding thought is that she was becoming to robotic herself, and I wanted her to contrast with the robot, so I narrowed it down to more humanesque designs. The robot designs came much more quickly and I found I didn't need to produce nearly as many before I found one that just felt fantastically right. I was immediately enamored with him and only felt the need to do a few more iterations before I settled. It's actually a shame, I would have been happy to spend the next week devoted exclusively to drawing robots, but time is key, and I need to move on. 

I'd actually come to a decision at this point, that I would model the human first- even though I vastly prefer the robot, because frankly, I just outright need practice modelling people, and the robot could be broken down into prop type things I've done before. So despite what might be a wiser, safer choice, I'm modelling the girl. For the good of the future and aw man I really wanted to model the robot. 

Sunday 30 November 2014

Character Diwhatamy?

dichotomy
dʌɪˈkɒtəmi,dɪ-/
noun
  1. 1.
    a division or contrast between two things that are or are represented as being opposed or entirely different.
    "a rigid dichotomy between science and mysticism"


A character project, finally! Or so I thought anyway, it was a weird first week. Designing characters is normally one of my favourite things to do, or at least it certainly was pre-uni. I suppose since then my interests have shifted more towards environmental work or maybe I'm just a bit put out by how this week as gone.

Let me start by saying that this brief is open, and while I can see how some people would -and do- love this, I think I speak for the majority when I say that maybe it is too open. For starters there's no tri budget, texture budget or style restriction. This is the first project we've ever had of this nature (It's our second character project ever) and it's... intimidating- ps we need to design two characters. It's intimating and I think I had a bad reaction to that much freedom, I immediately went into panic mode and started to choose themes to help narrow it down, I started moodboarding for tribal and sci-fi, two totally different types of character. After our reviews, I realize how terrible of mistake this was, and I think it's because I misunderstood the purpose of the project, I was far more preoccupied with what I wanted to make rather than just silhouetting and having a unique character jump out at me. I was too threatened by the very short 3 week time period and I specialized too quickly into a design I didn't want.

I don't exactly dislike this page of designs, I just feel embarrassed by my total misinterpretation of the brief. It's all about the designing process and I skipped over a huge part of it. I was advised (to put it lightly) to, effectively start again. I can see the logic to this now, but there was a raw spot after those presentations where the whole year was collectively seething, we felt cheated and tricked. While I'm completely aware of the mistakes I've made so far this project, there is something to be said about the brief itself for allowing us to collectively get it so wrong.
Either way, time to reconsider.... everything, and get this thing back on track. I'm going to make the effort to put more of my attention into shape and silhouette appeal, rather than detail.

Sunday 23 November 2014

Air Inferiority

So overall I like my turret, I feel I attempted a difficult but unique concept and achieved all of the learning goals I set out to achieve in this project. But there's always things to improve on, and now that I've finished, here are some of the points I don't think I've mentioned in previous posts.

Okay, my main grip was my texturing, I feel my maps were strong and the roughness metal map worked super well with each other to make scratches, paint and rust, some of the materials don't read great. I think it' s because I wasn't sure what exact material I was going to use, even while I was making it. All I knew was it was some kind of plastic fairing material. I'm referring specifically to the white armored bits around the turret, I feel as though if I knew what exact material I wanted, I could have nailed it, but I was really just guessing. It could have done with being higher contrast with the metal for sure. Again this dates all the way back to my concepting phase where I should have done more in depth value studies and that itself might be the route of the problem.

Also seams, there were some... rough seams on that model if you knew where to look, I should have spent more time smoothing over them definitely. Also there were some areas of texture that in general weren't up to standard, but in fairness, those are areas the player wouldn't get to see, like top of the wings and bottom of the gun, but regardless it would be in good practice to bring those up to the same standard as the rest of the gun.

Another little misadventure I had was with Zbrush, which on reflection really just wasn't necessary. But at the time I just wanted to try it, so, that was that. But anyway the problem I had with Zbrush was because my model wasn't perfectly symmetrical before importing, I couldn't use the symmetry tools to get nice equal details on both sides. Weirdly enough though, after I went back into max and redid the symmetry line, Zbrush still didn't like it so I ended up just painting once side then copy and pasting it on the normal map.

Here's one I know I mentioned back on my concepting post, but it's still really prevalent. I think the weakest part of my model was the texture design itself, even if I did salvage it slightly by stylizing it half way though the texturing process. I would like to avoid this in the future and should give it far more attention in the early stages. what I needed was a good single value painting, so I could do a bunch more good looking designs faster, I could also have experimented with some higher colour contrast designs.


Going to reiterate again though, that I do like my turret. I think it's a pretty cool design and will definitely be using a similar silhouette/bash kit based work flow again in the future.


Sunday 16 November 2014

Air Superiority

Blueprints. Man, this week has been awesome, I've got everything functioning correctly and it really ties the turret together, it looks all techy and ready to go. I was very concerned at some points, because there were some low moments where I wanted to give up and walk away from rotation blueprints. Side note- you would think that of all the simple things to have, Unreal 4 would have a single node or two, that asked: 'rotate on axis/pivot? Great, what speed?' And that would be it, done, neatly wrapped and taken care of in a few hours work. That would be way too convenient though, instead it was a grueling week of trial and error, it really doesn't help that because this version of the engine is brand new, resources are scarce, there was no tutorials that had what I needed, so I was working from the ground up. In retrospect, this really taught me more than a tutorial would- I know exactly what every node does and why it's needed, and that's probably what got my next- far more glamorous- blueprint working as well- however I bet it could be done with half the complexity, oh well, fake it till you make it.
So all's well as long as those propellers rotate, Which they do- ha! I'm so pleased!
Oh- also: DMU 3rd years absolutely rock, they helped me out loads getting these things going and showing me how to work timelines. Really appreciate it!

I also got the bullets shooting out of both barrels, which was some pretty simple stuff, although it did give me some really weird bullet problems. There was a whole day spent constructing and reconstructing my turret because my bullets weren't firing. Turns out the second barrel collision box was screwing with where the bullets spawned, so they weren't going anywhere, so I had to remove the collision on the barrels, and I staggered where the two bullets spawns were for each barrel so they didn't collide with each other and make a terrible mess. Getting the gun working was pretty sweet though, it felt more powerful than the single and helped compensate for my tiny puny bullets.


Putting sound on there was also way easier than I thought it would be, though it is obnoxiously loud so headphone users be wary, just a cool stretch goal I managed to grab before hand in.  After that, I thought I was done, it wasn't until I was sitting in labs on hand in day when one of our tutors- Max- was checking everyone's turret out. He looked at mine and mentioned how cool it would be if I got it to move around the scene. I asked if he was serious and he gave me a laugh and told me to try. I'm still not sure if he was joking, but with a few hours to go, I decided to give it a shot regardless. I didn't expect anything, I'd spent a week trying to get propellers to rotate, I couldn't get this thing moving in a few hours... TOTALLY COULD, TOTALLY DID.

The turret now follows you around at a slightly slower speed so the player can kite the turret and keep out of range, or choose to engage. It will also always rotate around you to try and stay in front of the player. I felt like a total pro after getting it working, maybe the hours could have been techincally better spent polishing textures, but the blueprint and overall confidence boost this gave me I feel- on a personal level- was way more valuable.

 So project over- feel good, bring on the character project.
 Edit: Bonus video, sans sound, because I'm completely inept at video making, but you get the picture, in fact, you get the whole video. Hahahahahha


Edit2: Noticing it's not showing up on preview, if it doesn't for you either, here's the link; 


Edit3: I take it back, there IS sound, and it's really loud, so preemptively turn it down...

Sunday 9 November 2014

Ready-Aim-Oops


The modelling process was everything I feared it would be- I had to shave off certain elements of the turret to help preserve the delicate tri budget (Including those delicious side panel gun things, which will be mourned) and the circular nature was making topology tricky.
Also it came out a little less angular and sharp than I had hoped it it would look, but it did match my concepts, so maybe it just me.  I think I could have elevated some of the modelling weight by using different objects to make up larger portions of the mesh, instead of building everything from one. This not only was more expensive triangle wise, but also gave me some strange loops that had to be manually sorted out later.  I’m noticing this as a trend in my modelling lately and think it may be worth addressing- I’m much more inclined to model objects from one piece of geometry rather than use lots of simple shapes to ‘fake’ a single object. There are arguments to be made for both sides; modelling from as single object leaves less seams and strange inconsistencies where the objects meet. But also having everything from one means the topology is messier and more difficult to edit. 


I also had to change my idea for the pivot. I overlooked it in the design process because it didn't occur to me at the time, but the gun would also have to move up and down. My design flies- because of this it never even crossed my mind that instead of the whole machine moving up and down, the gun itself would have to- as per the brief. This meant i had to adapt from my flat purely horizontal rotation system (which didn't work anyway because I'd designed the gun at a slant, and it just didn't look right facing straight on, because then it doesn't make sense that it flies and- well you get the idea. I oopsed it. It didn't take much to adjust the design, which I did begrudgingly and with a deep set loathing for the way it made my turret look like it'd taken far too many diet pills and was bitterly missing some chunky goodness in the middle (clipping issues lalalala I can't hear you.) EITHER WAY, it works now and that's what it needs to do. Maybe the sleek look will grown on me... yeah probably not. 

It was pretty reminiscent of some of the concepts I'd turned down for not being turrety enough, or would be unable to rotate without aiming at itself, basically any of my designs that had too much decoration than hung out over the sides and went beside the gun. Also ruined any chance of having propellers on the bottom as well as the top- because how cool would that have been? I thought I'd already thought out the technical side of it but apparently not, I put a pivot ball in there instead, because that's a pretty legitimate solution to anything ever. 


I mentioned earlier that I wasn't completely satisfied with my textures, this only became more apparent during the texturing process. I found it challenging to work with white clean surfaces like I’d planned. It simply looked bland. I tried changing the hues to adapt to the problem but then it simply looked odd and lost the clean appeal it had.  However I decided something need to be done so I started adding rust and scratches around the entirety of the model and then revamping the entire style to embrace a comic-esque, outlines style and everything came together. The rust and scratches worked great with the outlines and the characterization of the turret was shifted from military and clean, to battle worn and fierce. I thought it was an entirely suitable change that still kept the core theme in check- predatory.


Bonus unwrap sheet for your viewing pleasure.


Sunday 2 November 2014

Sentry Fun


Having a bash kit for the Sentry Gun project was awesome.


It was a fast and efficient way to identify and distinguished and unique shapes from pre-existing objects, and them mixing them all up to get a whole page or unique shapes.  Even if an object I used was overall simple and uninspiring, when made into a silhouette it could be anything. I found the most interesting shapes to be insects and birds- this made it easier to ‘personify’ the sentry turret with sharp edges to make it more predatory and menacing.
One aspect I honed in on very quickly was that I wanted my turret to fly, float or hover in some way. I felt this made it stand out more since I noticed that the vast majority of people had stuck to the basic format that we were given: base, pivot, gun- in that order. I wanted to change things around a bit. All I had to keep in mind is that it still has to function in the way the brief describes, and I was confident I could still make that happen.
A downside of the splicing was I got pretty carried away- I got too elaborate with the designs that were very complicated by nature, and was torn between a design I loved, or trying to find something more suitable for the triangle and texture budget allocated. I danced around with whiteboxing and decided that some of my designs were unreasonable. Despite this when I asked my peers their opinions, the general consensus was overwhelmingly positive for the complex design. So I decided to try and merge some together to retain the essence of that design, but make it more appropriate for the task.


One of the other big decision I had to make this week was if I was going full out sci-fi hover turret, or a more standardized 'heliturret.' The major distinguishing feature being a choice between propellers and energy balls things. I've never gone into too much depth with blueprints yet, but there's definitely a want there. Not going to spend another project drooling over emmisives. I've begun to notice that's what's setting the year apart as well, engine value. It's new and shiny and cool as beans and I want in. 

I went with the propellers because I decided I wanted to keep this design relatively grounded because I found myself leaning more towards the mechanical part of 'bio-mechanical' and want to embrace that theme. 
Finding a nice colour scheme was a lot more uninspired than the design itself, they all felt lack luster. I referred back to mood board colour palettes but found it equally fruitless. It was probably the weakest part of my design conceptually and was a real damper on my overall excitement for the project. I’m sure more could have been done with the colours, but time was of the essence and a decision had to be made me. I went with a simple, muted selection because I felt the subtle and reserved colours fit the atmosphere of the design adequately, something reminiscent of military helicopters and jets, with the white/grey plating that looked like a modern suit of armor. I also added in some contrasting yellow for flavor, impact and indistinguishably.  Either way I'm not married to the colour scheme and if I think of something else while I'm modelling, I may just embrace it.


Wednesday 29 October 2014

Film Project; Post Mortem

So with the conclusion of the film project, what have we learned? I think I've picked up more engine and technical skills in the last two weeks that I have in the entire first year. It was intense, thrilling and enlightening. I feel more confident after this project about my future on the course than I have done for a long time, and that optimism will hopefully be long lived- I just feel excited for the next time I'll get to sculpt in z-brush or make emissive lightning in Unreal 4.

What went well overall was our ability to work as a team. We were like-minded, ambitious and organised, using lists and graphics to keep scheduled- which wasn't much of a problem anyway since everybody was in labs everyday, often working from 10am to 9pm. This is also made communication fluid and constant, there as a constant stream of feedback and help where it was needed and noone was reserved about teaching processes or technical skills. It was a great environment and I'm terribly thankful to my team for such an atmosphere.

In terms on the scene itself I think the technical aspects were particularly strong. We were the only group to have an interactive element (the flickering, glowing sign) and that made it really stand out. We also had lots of texturing detail using things that are generally unstanderadized within our year group yet, like projecting mapping and z-brush that made our scene look polished and accurate.

I also think our worked well because of the huge amount of instanced and repeated assets, which meant we could make out scene bigger and more complicated than others, without crippling our tri budget.


I also feel our scene choice was quite strong, we were ambitious with it and I know some people regret not choosing a simpler scene and doing it to a higher quality. But on a personal level I'm happy we chose this difficult one because it had so many unique opportunities to make the most of metallic textures and a little bit of sci-fi architecture that makes it so interesting.

Aside from our great engine crash from a prior post, the  biggest problem we ran into was t he perspective and shape of the room. Dex's Diner is a rounded scene so establishing that was allot harder than we had anticipated. The bar in particular was a nightmare to fit, because it was so critical in the shot, it's position was paramount but because of the grooved shape, any mistake was glaring so it had to be constantly re-sized and shaped to fit the room. Lighting was also a challenge since we were dealing with such a huge amount of light sources and try to replicate not only the mood but individual shadows. However one always had an effect on the other making it awkward to balance. There was also so many different light sources to deal with- natural light from the windows, artificial lights and the other numerous different lights in the room and so on.

If we had the opportunity to start over, one largely agreed upon notion was that we should be more careful distributing jobs; Tom, who organized our engine (because he happened to organize the main room so assets were naturally sent to him) was inadvertently given him the biggest job. To avoid this in future I would perhaps have a dedicated engine person who handles less assets and texturing because of the extra responsibly they take on. We also could have had 'official' asset reviews. As I mention earlier we were constantly reviewing and feed-backing each other's work as we went along all the process- but an official review might be a good idea to really critic each individual asset as a group all at once, so multiple changes could be made simultaneously instead of a steady trickle of suggestions.

Overall though I'm proud of the scene we made. Working as a group was an incredible source of knowledge and the I think we all emerged better game artists because of it. Also on another personal note- this project has gotten me into great working habits- similarly to the last group project. My pace and workflow has improved, and the quantity and quality of my work has grown because of it.


Praise the sun(box)!

So...
Our sky is gone. Literally. We were all in labs working on our project making a very important group decisions- our team name (it's CTRL_ALT_DEFEAT by the way.) In a strange blip of white light, our computer screen that was hosting the scene, suddenly blipped white, then  black then...
                                                   Oh God, it's all... it's all broken 

Our scene collapsed in on itself like a devastating black hole, and destroyed all our lighting, textures and simply removed everything we had outside the scene, putting us in a void. We had no idea why this was happened (although we suspect it had something to do with skybox?) Regardless it meant we had to re-import every single thing again since autosave blocked us from reverting. It also butchered our metals and left them a dark grey, regardless of metal or roughness maps. 
There was nothing we could do to save or recover the scene. No matter how much the scene was lit up our metal was black.
The only course of action was to rebuild our scene from scratch- and to our dismay, as we began to attach materials in our rebuilt scene it happened again. Luckily the solution this time was to bring in scene reflection sphere to put light back into our scene. If the crash taught us anything it’s to not rely on autosaves and save many alternate versions along the way.  Also to never delete the skybox. Maybe. Who knows? 

Frankly I'm just relieved our team is ahead of schedule enough for us to rebuild in time for the deadline (in two days!) Though it is a shame, we were in such a comfortable spot and now its chaos and panic. Though at least this can be an opportunity for everyone to fix names and organize all our assets and textures, right!? and while that is true, this still sucks, massively. Bugs happen. 

ZBrush; my favourite worst enemy

So we've divided up our assets and I was allocated the stool, misc silver and cups because I was the only member of our group familiar enough with zbrush to tackle the cup designs, which we knew early, would definitely need to be sculpted.
 
I started with the basic cups at 300 triangles each (I used 252) to make each of the basic shapes. One was slightly higher and had a larger rim but aside from that they were very similar, but the slight difference is shape made a nice difference considering how many time the cups would be instanced and repeated around the room.

My next task was to sculpt the detail into the cups, I had a very limited experience with zbrush prior to this so I was slightly apprehensive but once I started I found myself enjoying the more authentic ‘modeling’ feel to it. It was far easier to creature the curves and grooves this way than in a normal map. Unfortunately while the zbrush object itself was overall successful, I had a huge amount of trouble high poly baking it because of some things I failed to prepare and anticipate I needed in the 3ds Max file.

We decided we were going to conserve texture space and combine the cups, ketchup, salt and pepper, table, scones and plate were not slated to share the same space. Unfortunately because I’d already unwrapped and sculpted based on that unwrap, it was now unusable. There were also some problem with the bake itself as the cup was not centered to the world when it was exported as on object (I thought I could move the bake once it was in the scene- but it doesn’t’ work that way) so I needed make sure for cup was in the exact correct final position before I took I into zbrush.  I also had a problem with dividing the geometry in zbrush completely obliterated my corners and made the edges and rims smooth- so when I went to mask out the top and bottom, I didn’t realize I was missing one of the edges because it had been totally smoothed out. The mask was also a bit rough as you can see because some of the pattern goes over where it shouldn’t.  So for these reasons the first iteration of the cup didn’t work.  Too help with the dividing I tried turbosmoothing the mesh before exporting, this helped with the divide itself and everything kept it’s angles, however it made the high poly bake process very tricky, I also couldn’t quite get the pattern the same and zbrush consistently crashed so eventually I decided to just export it as a normal map and just copy it into height map. This gave me the exact pattern I wanted from the original try and also allowed me to completely and cleanly keep my angles by editing where the lines ended and began on photoshop. The overall effect is incredibly similar to what a high poly bake would have achieved but was far better to handle.
  I tried to do a similar process with the second cup but this time I realized that because unlike the prior, this pattern was repeating and need to be even and equal, that it would be more appropriate to do it with the standard height map. This yielded a much crisper result and I now know where the use of zbrush is more appropriate.

Texturing the cup was frustrating, because the actual reference has absolutely no roughness or texture detail, I constantly tried to fight the urge to over complicate the design, often I added to many roughness details and had to backtrack because it simply didn’t match the image. Even if the end result looked good. A few iterations in I found a good balance in detail and just let my normal map be the prime decoration of the cup- just like in the shot. Although a higher resolution picture would have been a great aide. 

Everything is brown!

So our new project has been set! The task at hand is a group project to replicate a scene shot from a movie as accurately as possible. Sounds interesting.

Choosing a scene is the most important creative decision to make in this project- we need a scene complex enough to be interesting but not one that would absorb all our triangles or time. To compensate for this we wanted a scene that had incredible presence and mood, with interesting light and composition. With this in mind we made individual random mood boards that we then brought back together for discussion. We discussed how we felt about anime or cartoon rooms as some of them had interesting light and shape, but eventually decided we wanted to air on the side of realism. We made this decision because we didn't want to put something that had already been stylized and put in engine back into engine.  We also felt the scene that left more overall impact while still being feasible were the realistic ones.
Once we narrowed our choices the one that stood out was a shot form ‘Guardians of the Galaxy’ that I found, we felt it had an interesting challenge with the grids and the light shafts, as well as interesting texture potential and a shot that leads you to a solid focal point of the scene. The beams frame the light in the middle and we felt this would make for an aesthetically pleasing scene.  With this in mind we presented our idea to the 'dragons den' and were advised to reconsider based on the bland brown colour palate. We felt the texture and lighting were enough to make the scene stand out however soon resigned back to our search that combined what we liked from Guardians and a scene with an interesting colour palette.  
It was an important point that was made though, when we reflected on our original moodboards, they truly were overwhelming brown and dull. They had interesting compositions, sure- but did they stand out? Not really, not in the way we needed our scene to stand out. We were advised to look at influential artistic movies from the past like Space Odyssey, that was simple yet effective because of its contrasting colours. Also to disregard any personal attachment we had to the moves themselves, and look at them purely objectively and expand our search to movies we hadn't heard of/seen, or even considered watching before. 
Once we began searching again it was a far more arduous process and we looked specifically for bright and colourful palettes. The problem we had is while these scenes hit the criteria of an interesting shot, we didn't really like them, and often the colours were abrasive and unpleasant so we continued to cycle through.
We originally got to the point where we were choosing between two scenes: 
Both of these scenes were solid choices- once was hindered by over complication and the other by simplicity- we had just come to the decision to do the one on the left, when I stumbled upon our Star Wars scene, it had the style and character of a retro bar but with the sci-fi chrome textures and lights that I love so much. It was oozing with potential and there was enough individual assets to slate the needs of six ambitious group members. We returned to the 'dragons den' with our scene, armed with colour picks and grey scale studies. We felt it was the strongest scene we’d found that had exactly what we needed.  The colours and lights kept the scene bright and interesting enough without dominating it.  Another beauty of our scene is it uses so many repeated and instanced models which means our scene has the potential to look far larger and complex than our other choices. We knew the scene would be challenging but were more than prepared to tackle it regardless, the ‘difficulties’ simply served as an excellent opportunity to learn new technical engine skills.

To our enormous relief- the choice was approved and with apprehensive optimism, we move onto the next step. 

Sunday 12 October 2014

Team Not Applicable!


It's Game art year two and we've kicked off with some group work, it’s pretty crazy since all our lab groups have been sporadically moved and you've ended up in a group of six or seven people you don’t know  particularly well. At first I was apprehensive but it only took one day working with my new team to fill me with optimism for the rest of the year. After a short week my new group are also my new friends and I’m genuinely excited to continue working with these people on future projects- staring immediately with the Film Set brief.

The strangest part is I've found myself spending my days working in labs instead of at home, and that’s a huge, huge difference because I've learnt so much just idly watching whoever’s next to me and picking up on tricks and tips that have totally changed my workflow. It’s also far easier to just ask someone around you for help or for crits rather than to search fruitlessly online for a solution.  Also strangers who happen to see what I’m doing and compliment it or ask me how I did it is really helping my confidence and I’m finding it’s finally an environment I feel comfortable working in.

Another advantage to group work? It keeps me working at a pace that I wouldn't usually be able to maintain. Wanting to impress and cooperate with my team keep me on a strict schedule that in the long run reduces my stress and helps my general organisation and time management skills.  I’m working far more hours than I did last year and it feels productive and good. Like I ’m seeing real and significant improvement.
Two weeks into the second year and I’m loving it.


Anyway, the actual project itself was a Viking Tavern Bar scene which was pretty interesting for a quick thing, I designed and modeled this candle playing with the new roughness and metallic texture maps- which are delightfully effective. I think they really helped my candle model looking as real as possible. Oh and also the new engine- for all the complaining going around I think I prefer it.... or just don't hate it yet anyway So far it's eaten less of my work and hasn't made me murderously angry or chronically depressed yet so what's not to love? Though I do miss the prettier default sky-boxes from UDK.


Sunday 4 May 2014

1920's Chicago


So this week I spent working on our Chicago character project. I honestly wasn't crazy keen on this idea when it was announced, it just wasn't up my alley. Despite that, once I actually got researching I found I had a metric tonne of ideas! I was torn two ways between a well suited, shady and confident female gang leader or an Aviatrix. I was actually more inclined towards the gang leader character because I'd become attached to her character in the short time I had to figure her out, but I was more draw in towards the less popular Aviatrix, just because she felt a little more unique. I also can't resist goggles. I really can't. So I rolled with that and had an absolute blast with it, the outfit is a mishmash of official gear and her own style that I just couldn't resist adding. The colour was actually a quick job, I'm not used to colouring my paintings so i simply used an overlay layer, but didn't like how it muted some of the colours. I tried simply painting over the black and white but I wanted to keep the rendering on the original painting. Eventually I just reverted back to the overlay and it just grew on me. I started to feel like it fit the 1920's theme. regardless I left the black and white version intact in case I decide to take another shot at it.

Sunday 27 April 2014

Jobs!?

Ideally when I get out of university, I want to do conceptual art, more specifically, character art. While it'd be close to impossible to get such a specialized job so soon, I thought it would be interesting to see what kind of requirements large companies were asking for and how I could respond at this early stage in my development as a games artist.
I found an application as a Senior concept Artist at the prestigious Riot Games, lets take a look:
As Senior Concept Artist, you’ll be embedded with the champion design team from concept to execution, working with as little as a napkin sketch and as much as a full blown narrative concept to develop memorable and compelling champions.  You’ll generate, sketch and iterate the visual ideas, insights and eye candy that take even the smallest kernel of a concept into full-fleshed champions that live, breathe and bring something completely new to the Fields of Justice.
So as a summary, I must be able to adapt to different requests and be able to both follow very strict instructions on design, but also be able to design something from very little.

YOU ARE:

  • Artistic and prolific: your keen eye for lighting, color, form and composition inform your work from ideation to creation; you’re a master of the rapid sketch, quickly generating ideas knowing that sometimes it takes a hundred good ones to get to the great one
  • An experienced collaborator: your artistic hand reflects years of experience refining your craft, but you’re also a natural and avid collaborator; you coat-check your ego, but are eminently capable of articulating and defending your next great idea
  • Multi-dimensional: you’re as experienced and knowledgeable with pad and pencil as you are with Photoshop and similar 2D software; you’re also comfortable trekking beyond Flatland to experiment with Zbrush and other 3D programs
  • Genre-bending: you have cat-like reflexes for chasing a great yarn, whether in contemporary comics or ancient mythology; you’ve built a Noah’s Ark of archetypes, ready at a moment’s notice to set sail into brainstormy waters
  • Anatomically correct: you have advanced understanding of human and animal anatomy, but aren’t afraid to stretch the limits; exaggerated, stylized proportions feel perfectly balanced in your hands, and superheroes line up outside your studio hoping to be drawn in one of your staggeringly dynamic poses
  • A player-focused gamer: as an avid League of Legends player yourself, gaming is as much a part of your artistic palette your trusty pen and sketchpad; though your art's awesomeness commands attention, you'd never let it upstage the holistic player experience
  • Being artistic is a requirement. I think we all saw that coming- aside from that its important to note that they want someone who won't get too attached to a certain design and be willing to do it again and again and again until one strikes a chord. We also need to be able to do this quickly, it emphasizes the importance of some of our lessons on silhouetting which is a good way too generate lots of different ideas quickly. 
  • Being able to work well in a team is a skill I feel I have, or at least have great potential for, like the description says is a mix of collaboration and also knowing when to hold your ground on certain aspects to get a idea across without being walked over or dismissed.
  • I know that 2D goes hand in hand with 3D, that's what makes this course so alluring since its often a requirement to be able to use 3D software, even in this very specialized position. 
  • Having a strong visual library and being able to draw inspiration and references form things we've seen in the past- be it movies, comics or games. 
  • At the moment, I may not be as strong at life drawing and anatomy as I need to be, but I'm leaps and bounds ahead of what I was last year, and I'll be stronger next year as well. Correct proportions are the backbone for all character art even if you are distorting them to some degree. 
  • Be a League player? Check. Got that one covered. 
  • YOU WILL:
  • Sketch, ideate and iterate new champion concepts in collaboration with fellow concept artists
  • Collaborate closely with writers, animators, game engineers and splash artists to define champions that are both narrative and visually cohesive
  • Develop detailed concept art and orthographs for 3D designers and animators to implement into working models
  • Be an avid researcher and collector of story tropes, archetypes and narrative devices of all kind
  • Challenge video game conventions and explore new territory for the League of Legends IP
Basically putting who you are in the above section into context! 

Art Direction

ArenaNet makes beautiful games, and I admire them greatly, so when we were asked to do a presentation on art direction- I knew exactly who to go too. In their game Guild Wars 2, they adopted a striking painterly style, but it goes beyond the visuals, the paintings are very atmospheric and give glances into the quality of the game.


 This is a character paining for the leader of the 'Norn' race and what I think it is important to note is the small details that go along way in creating an immersive sub culture which ArenaNet is trying to do. it gives off tribal vibes with the fur and leather while leaving areas showing the tattoos which is presumably an important part of Norn culture hence why it has been left showing. The expression and stance indicate a strong character and the angle the angle the viewer is shown is beneath the character, looking up. This subtlety dictates power and control making this character fearsome and dominant, not to mention she stands out from the slightly washed out background. All these things add to how we perceive the race in game, just from composition and little visuals details that make it feel authentic.

The colour really stands out here, it gives the impression of warmth and life with the yellow which is made to feel especially cosy against the cold blues and whites in the background. It almost resembles a beacon and refuge point in a desolate environment. The shape is also really dynamic and interesting for a fantasy universe and the sense of height and precariousness adds an element of intrigue to the city.


 I mentioned before that ArenaNet was revered for it's ink style and this is what I mean, I love the way it looks like a mixed media piece and has lots of energy. Its feels much less static that traditional character concept art and really feels as though the designs are coming to life and standing out. It also feels like it gives the paintings an inherent sense of movement and flair.


The  sense of scale here is key, the angle makes the  structure feel even more colossal than if we were looking at it straight on. I always get the impression that you are and onlooker in the painting starting up in awe of the wicked prowess and power the ships have and being able to witness them is a profound honor. The 'light of dawn' feel also adds to this as the yellows and oranges add to the regal heroic presence. Also if you look closely on the detail for the building allot of it isn't actually structure, it just paint texture and colour to give the impression of busyness without detracting from the focal point of the image that over-detailing can do.

Overall I think the Guild Wars 2 Team has a roster of immensely good artists who know and understand the importance of composition and the delicate use of painterly texture and inky styles. I feel is stands as a lesson to all of us that a pining doesn't have to be hyper detailed to have a strong impact, but colour and texture can be used to create movement and flair.